Friday, January 29, 2016

January 29, 2016


Moments {Nani Ke Ola and Helmar}

I have been waiting for just the perfect papers to scrap this picture of my oldest daughter.  She came by to visit me at what they call "Mommy Daycare" or what we know it as the scrapbook store.  lol  I could spend all day there in their craft room.  Now I have moved away and there are no scraps stores to be found anywhere in my area.  So sad!
 

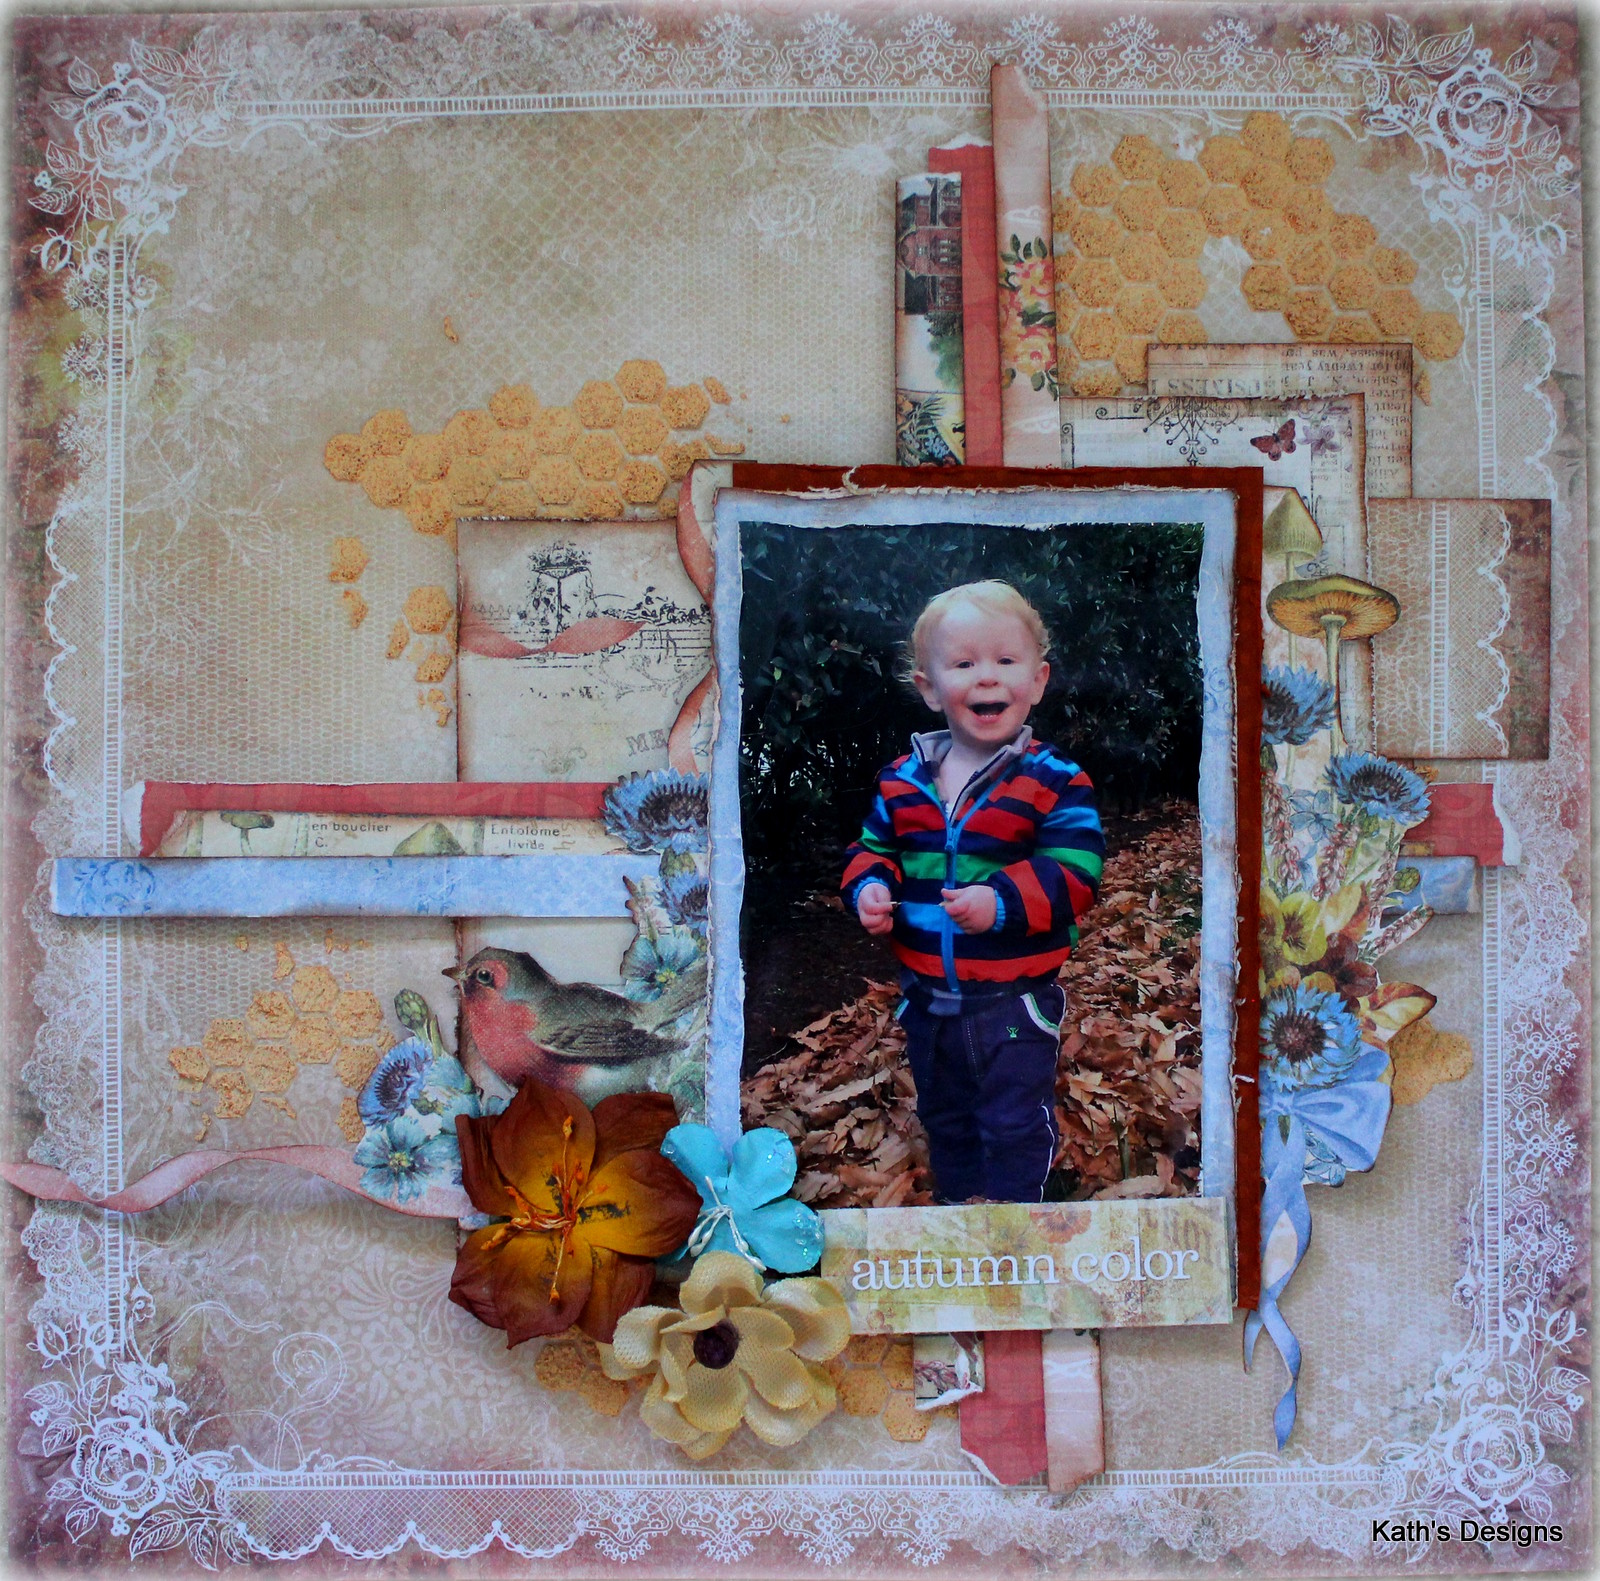
Hi everyone I am happy to share with you today a layout I created using the lovely Marion Smith's Junque Gypsy - Shangri La paper and Sans Souci papers.
Nani Ke Ola carries a lovely selection of Marion Smith paper collections and 7 Dots Studios chipboard plus an assortment of pearls like the black one I used on the chandelier.
 

I began by using dry wall tape in a cross pattern.  Then I came back and applied a diamond mask with modeling paste and spritzed some Lindy's Stamp Gang Tibetan Poppy Teal dabbed some Ponderosa Pine Olive and finally Hydrangea Blue for depth of pattern.


Next I cut out the post cards from the Sans Souci paper and created my layers to frame the picture.
Helmar has a wide variety of sizes, shapes and colors of pop dots perfect for all of your layering needs.  I used the Helmar clear 1/4 inch zapdot for the chandelier pull and for the bird cage.


To give the picture plenty of lift I used the Helmar 1/2 inch round black zapdot.  Now I have plenty of space to tuck my flowers, chippies and such around the picture.


Thank you so much for stopping by my blog today.  I so enjoy reading you sweet comments.  


Monday, January 18, 2016

January 18, 2016

 This challenge will  accommodate all levels of scrappers from the beginners/clean scrappers to all you mixed media artists!

One Layout three ways

Using C'est Magnifique "New Beginnings Kit"


Layout one is for the novice or those who lack the time for adding detail at the moment.  This is a perfect starting and stopping point.  
tip: You know those strips at the bottom of the 12x12 papers with the company information, save them.  They make wonderful layering strips as seen above.
 For the base of this layout I created my focal point with strips of paper then matte my picture with the post cards from one of the papers added a few flowers and viola you are done!
{Main kit only }


Layout two I added areas of interest using a honeycomb stencil and modeling paste.  
tip: Add a touch of paint to your modeling paste to coordinate with the color palette of your papers.
Fussy cut  a few graphic from the other papers and layer them to either side of the picture.
{Main kit, Flower add-on and paint from the Mixed Media kit}


Layout three I spritzed the background with a couple of colors for depth and interest.  I removed the word tag tucked it into the upper right right hand layers.  With the lettering from the kit I created my title.  More flowers and leavers were added to floral arrangement and snippets of lace were frayed out and tucked into the layers.  Finally I added a twine bow and a few micro beads(from my stash).
 {Main kit, Flower add-on and paint from the Mixed Media kit}
A few close ups


Thank you for stopping by and taking a peak.  I hope you have found these steps helpful for your future projects.

Monday, January 11, 2016

New Year's Resolution "Create your own Cards" with Helmar Glue


Happy New Years!

 I have made a New Year's resolution which I haven't done in a very long, long time!  Kathleen
here sharing with you my venture into saving money this year by creating my own all occasion cards featuring Helmar Permanent Adhesive Runner .


All the cards are a standard 4" x 6" and fit easily into a legal size envelope.

Begin by cutting a piece that is 8" x 6" as you base card.  
Fold it in half to measure 4" x 8" making a firm crease.
 
Now I don't know about you but I have loads of bits and pieces from paper collections  I have used through out the years which are perfect to create the cover of your card.

Once you have settled on your design simply take your
Helmar Permanent Adhesive Runner
across the pieces and adhere to the card.  I use it on even the smallest pieces including the flowers and ribbon.  The bond is super strong!

This card looks like a large tag on the front but opens into a regular card.

I hope what you have seen here today has inspired you to let your own creativity take flight.


Friday, January 8, 2016

January 8, 2016 {Nani Ke Ola design team}


Mixed Media layout featuring 7 Dots Studio's Cold Country Collection


"Secret Diary"

I was in France last year cruising the Seine River.  We explore this manor boldly displayed on top of a hill. 

This is a very simply and easy layout even for beginners.  First I gathered up various size papers and stapled  them together.  Then I matted my picture and glued a thick piece of cardboard to it which gives it height to tuck your flowers and chippies under. 
 

The Moroccan lattice piece was embossed with a combo of Lindy Stamp Gang Morning Glory Azure and Golden Angel wings embossing powder.


The 7 Dots Studio flourish chippies were sprayed with Lindy's Stamp Gang Cotton Tail Copper Brown Starburst paint.  Then they were tucked under the layers.


Once all the embellishments were glued in place I came back and lightly applie gesso around the areas then came back with Lindy's Stamp Gang Ocean Breeze Blue and Hydrangea Blue.


For added interest I scattered copper micro beads with gel medium around the page.


The last step was to come back with a stencil and modeling paste to add a bit more interest.
 
I hope you have enjoyed what you have seen here today and let your own creativity take flight.
 
Thank you for stopping by and do check out the Nani Ke Ola store to see what is new and to stock up for the new year!
 
Items used in this layout


Tuesday, January 5, 2016

"New Beginnings" C'est Magnifique kit


"New Beginnings" C'est Magnifique kit

My first three layouts featuring my incredibly cute grandson.  I present to you bold and fun, earthy and lively, soft and sweet.

We will now have moodboard challenges instead of the sketches.  Here is my take on our first board.

This month we have the pleasure of playing with the irresistible "Blue Fern Studios Autumn Anthology".  These papers are gorgeous with beautiful outdoorsy graphics and deep rich colors.  The kits has so many wonderful goodies to create  a wide variety of layouts and ATC's.  I am in love with this kit!

In this layout I used:
Main kit, Mixed Media kit, Flower add-on

For this layout I started with a splash mask and modeling paste.  I infused my paste with the Blue Bubble paint.  Once it dried I came back over the splashed with the blue paint to accent them and outlined it all in navy blue marker.
The picture is double matted with tag cards, doily and ribbon creating more interest.
The key crown chippie and hearts received a coat of gesso followed by a light brushing of the Mango Milk paste.
Finally I came back in with my paints to highlight the splashes, created a floral arrangement with the chippie and added a few micro beads.
 Stash items:  Micro beads, blue magic marker, Cheese clothe and gesso


I will be presenting a monthly one layout three ways feature.  This is the third level.


I used the main kit, Mixed media kit and the Flower add-on.

Stash items: Micro beads, stencil and modeling paste.

I love this month's chippies!  This is a picture of my grandson's playgroup.


I used a flower stamp and the embossing powder on the blue paper.  So delicate and lovely isn't it!  I applied a light coat of gesso on the chippies then used the embossing powder from the mixed media kit. 


I used the main kit, Mixed Media kit and the Flower add-on


C'est Magnifique will also begin with a project life pages section.
This is my first attempt.

 This series show what a fabulous time my daughter and I had in London England a couple of years ago.  Can't wait to go back!!

 This kit has all the elements to make fun and interesting picture pockets!  I look forward to creating my first album over the next twelve months.  I hope you join me and share your projects with us on facebook!


I used only the Main kit.

Thank you for stopping by and taking I peek!


Friday, January 1, 2016

C'est Magnifique Pinterest challenge for January 2016


Hello C'est Magnifique friends! Today is a day of new beginnings, when we all make changes and try new things. With that being said, this new year with C'est Magnifique we will be doing some different challenges to inspire your creativeness and ours! Instead of our normal sketch challenge we will be having a Pinterest Party every month! Everyone loves a party and we are sure you will love this one too!
What is a Pinterest Party you ask? You create a layout based on the photos we have put together in a collage. Inspiration boards such as this one are used to inspire you in many ways. For example with our first mood board you can add bling as in the center photo with crystals and beads. It also has metals that you can draw inspiration from by adding metal pieces to your project. The flowers in each of the photos are beautiful and colorful and add romance and beauty to any layout. We all love flowers! The porch swing along with the picture of Peonies offers inspiration with it's vintage feel. And last but not least the beautiful lacy gown gives us all fantasies of a dreamy romantic Cinderella story with lots of layers and beautiful lace.
It's that easy!
Our first challenge begins today with our first Pinterest Party! We hope you will all play along and of course there is a prize to be had so get out your scrapping supplies and get started! The photos are inspired by our January kit, but you don't have to use the kit to play along.
Photo
Here are rules, they are simple and will make your project enjoyable to create!
1. The challenge runs from January 1, 2016 and ends January 31, 2016 at midnight.
2. Create a project using our January Inspiration Board. You can create a layout, altered project, canvas, cards or anything that inspires you from this Inspiration Board. You can choose inspiration from the photos, colors, textures from one of the photos or all of them!
3. Upload your project onto our Facebook page and our team will vote on the projects by the end of January. Be sure to follow our page and like us!
4. Have Fun! Can't wait to see your projects!!


                                                    Here is my take on the pinterest challenge.