Chattering Robin's Design Team
I am incredibly delighted to have been asked to join the Robin's Nest Design Team!
This month the chatter is all about adventure! As a child of two working parents we very seldom went anywhere. Vacations were very rare. Fortunately for me I was a avid reader and my summer adventures were as close as an opened book.
The first time I saw this paper (
Honeycomb Fleur) an adventure formed in my mind. This is a beautiful flowing monochromatic designed paper of excellent weight. I used
Brown on Brown Glitter card stock to frame the layout. This card stock has flecks of coppery glitter that just doesn't photography well. I hate to waste the entire paper since all we see is an edge so I cut out the middle to save for another project later.
I cut 1/8 of an inch off of all sides of the Fleur Honeycomb paper and applied textured paste to two different stencils still keeping to the monochromatic theme. Then I glued it on top of the card stock. I will come back later and apply some paints to give the designs more depth.
Now that the base of the layout is complete I start to build up the layout. I stamped a piece of 6x6 brown card stock with shabby tote ink and on a brick stamp. I cut a 6x3 inch piece of drywall tape and placed it underneath the brick wall which I cut out a few bricks for interest. Next layer center I tore a 6x6 blue card stock paper to match the tear on my photo which I glued to a piece of cardboard to give it height. To the right nuzzled under the photo is a lovely filigreed chipboard gate.
Next layer!
Layers build interest to your layouts! It also helps to tell the story of your photo.
This is where I start digging into my stash. Cheese clothe cut into strips and tugged at to cause separation and long strings. I start laying it down all across the layout. Tucking some under the brick wall where I used a few pop dots to lift it.
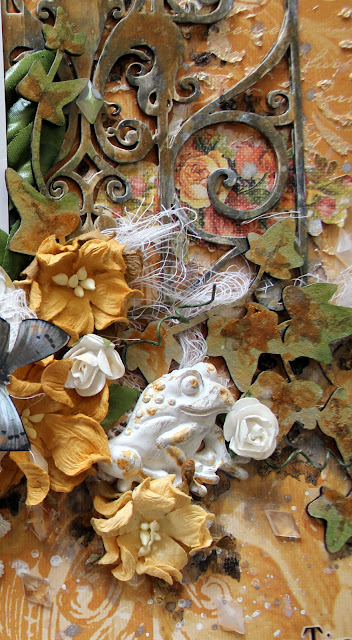
The frog and clock resins were tipped with gold paint.
Take a close look and you will see these gorgeous Robin's Nest
Shimmer Diamond Dew Drops . I love, love , love these gems. They are subtle shapes of interest that blend right into your design. I love how they capture the light and sparkle!
Robin's Nest Time Flies Rubons are so easy to use and add the perfect accent to your project!
For the ivy sprigs I began with a top coat of shabby tote ink followed by a layer of Shimmerz inklinz miner, miner 49. Once the first steps are completely dry I come back and apply a darker shade of gold at the base of the leaves and allow this to dry. Next I add color with some green moss lawn ink. Finally, taking a fine paint brush I come back with Shimmerz Chocolate Brownie paint and paint along the veins of the leaves.
For the chipboard word I used hydrangea blue embossing powder.
Yes, you have guessed correctly if you thought of Harry Potter heading to platform 9 3/4 ! Have you spotted the Neville's frog and the flying key or the shifting bricks allowing you to enter Diagon Alley.
I hope this has inspired you to let your own creativity take flight!
Product list
Honeycomb Fleur paper
Brown on Brown Glitter card stock
Time Flies Rubons
Shimmer Diamond Dew Drops
Paints
Shimmerz Inklingz Miner, Miner 49er
Tattered Angels Camel Glam
Lindy's Stamp Gang Silent Night Silver
Ingvild Bolme Shabby Tote ink
Ingvild Bolme Moss Lawn ink
Stampendous clear embossing ink
Lindy's Stamp Gang Hydrangea Blue Mauve embossing powder
Shimmerz Texturez Gold Mine
Creative Embellishment's ivy chipboard and word chipboard
Adhesives
Helmar Gemstone Glue
Helmar Tacky Craft Glue
Kafe Scrapo "wings challenge"
I adore their unique challenges. The butterflies have wings and in our imaginations we can also fly!
 13 Arts July challenge #32
 Scrap Africa sketch challenge


