Monday, June 22, 2015

Beautiful Day


Beautiful Day

It was indeed a beautiful.  This is one of my daughter's senior portraits.  The photographer said he would get us into this ritz'y' neighborhood to photograph Katie.  I loved the bridge at the entrance and the club house.  Unfortunately, he did not have access and we were chased off the property!  Still got the shots.  So, I think it was a successful day.


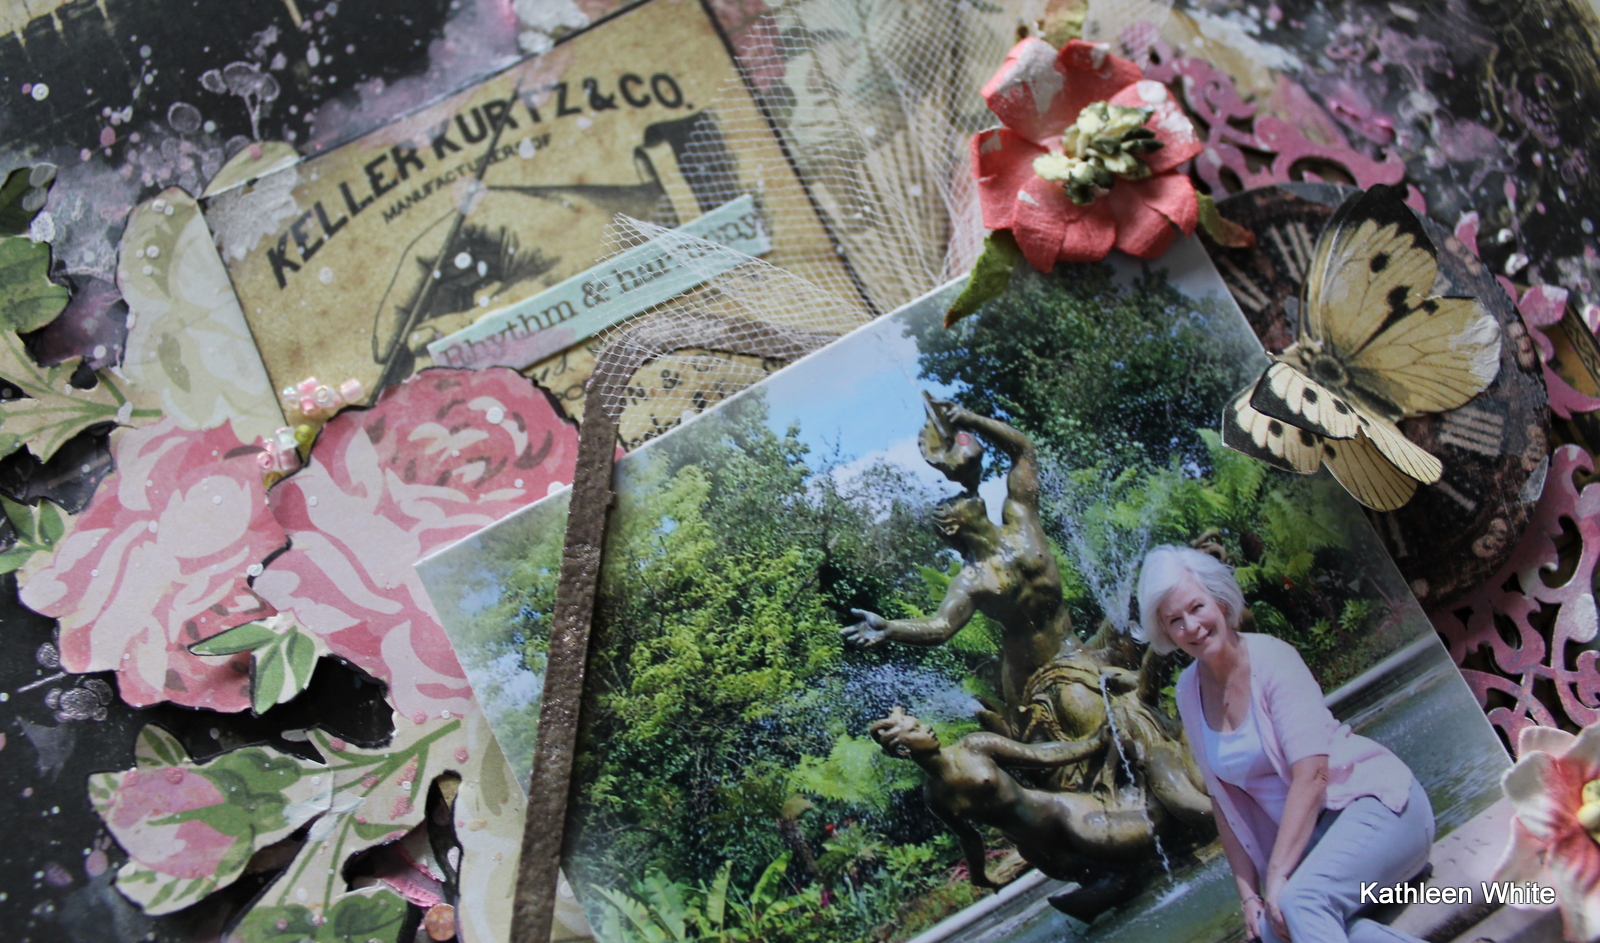
I had loads of fun creating this layout with the guide lines from the below challenges in mind.

I love to start with a fabulous sketch idea which was provided by Sketchabilities.

Next, I need a color scheme .  Thanks Words and Paintery for the colors and the adventure to this picture was awesome!

Finally, background ideas.  Stamps are always a fine way to add interest.  Thanks Berry 71 bleu.  I use at least three different stamp!


I used pop dots to lift leaves or flowers to create depth and interest.  Plenty


 Thank you for stopping by today.  I hope you have sen something that has inspired you!


Papers
Bo Bunny-Somewhere in Time Beauty
Graphic 45 -Tropical Travelogue-Rainforest

Mixed Media
Faber-Castell- Gelato-Peach
 Faber-Castell- Gelato-Blood Orange
Ranger-Distress crackle paint- Walnut Stani
dylusions-ink spray-white linen
Lindy's Stamp Gang-Embossing Powder-Golden Pumpkin Blush
Lindy's Stamp Gang-Embossing Powder-Silver Moon Turquoise
Lindy's Stamp Gang-Embossing Powder-Golden angel Wings

Embellishments
Creative Embellishments-word and frame chipboard pieces
Graphic 45-Travelogue-stickers
Kaisercraft-clear stamps-Butterflies
Tim Holtz-idea-ology-Botanical-rubons
stash items; beads, branch stamp and word stamp


Make your own canvas

Creating your own Canvas


Greetings fellow crafters from deep in the heart of Texas!  This is a picture of my daughter shortly after having her braces removed.  Isn't that smile "AMAZING"!  Have you ever wanted to try your hand at creating a work of art on canvas but didn't really want to invest in buying one?  Here is a simple cost effective way to create to your hearts content!


Items needed:
Heavy cardboard cut to size
Cotton material of choice


After you cut your cardboard to size squirt a generous amount of Helmar's Super-Tac Glue and spread it out evenly.  You can use an old credit for this is you have one.  Place pre cut fabric on top and smooth it out from the center to outer edges.  Let dry.


Now that you have your canvas apply a coat of gesso and allow it to dry.  Next I applied a top coat of white acrylic paint.  These two steps will keep your paints from bleeding into the material.

Now to create some texture by applying a stencil and paste.  Allow to dry.  
Now it's time to play with paints and mists of choice.


Place your photo where you like on your canvas.  I use a bit of Helmar Craft & Hobby PVA Glue to a square of card board and adhere my photo to it for a touch of height.


Finally I rummage through my stash for a few flowers and other elements to create interest and flow to my canvas.  


I hope this has inspired you to allow your own creativity to take flight.  Don't forget, whatever project you create always start with Helmar glues!


Helmar products used on this project.

Helmar Craft and Hobby PVA Glue
Helmar Super-Tac glue


Saturday, June 20, 2015

Happy Times

Happy Times!

London last year visiting my new baby grandson and taking in the sight of Regent's Park.


The background is a fusion of  of yummy pink colors including Lindy's Stamp Gang Frenchy's Pink Pouf,


 The bicycle and frame were first paints with a coat of  Lindy's Stamp Gang-Clam Bake Beige then embossed with Lindy's Stamp Gang-Golden Angel Wings embossing Powder.


Thank you for stopping by today! 

Papers

Marion Smith-Romance Novel Ch.2-Sweet Something
Marion Smith-Romance Novel Ch.2-For Keeps

Embellishments

Creative Embellishments frame chipboard
FabScraps- Penny Farthing Chipboard Bicycle
Brilliance Dew Drop- Pearlescent Orchid
Prima- Rosarian Wood Clocks
Authentique-Petite Diction stickers
Graphic 45-Bird Song stamp
stash items:  netting, ribbon, dots and beads

Paints

Lindy's Stamp Gang-Clam Bake Beige
Lindy's Stamp Gang-Sunset Pink
Lindy's Stamp Gang-Golden Angel Wings embossing Powder
Lindy's Stamp Gang Frenchy's Pink Pouf


I was inspired by the sentiment and the colors pink, gold, and black plus the lovely flowers


Tuesday, June 9, 2015


I have super exciting new to share with you today. 

Chattering Robin's


I'm super exited to announce that I will be working in the new Design Team of The Robin's Nest, many of you may or may not have listened about them, well they are a Manufacturing Company dedicated to create beautiful papers, card stock, dew drops, archival seeds, die cuts, ribbons, stickers, among others embellishments. You can see their products here.

The Robin's Nest has a wonderful blog full of gorgeous ideas to inspire you day to day with their wonderful products. I invite you to come daily and check out the work of this super talented Design Team.

Don't miss out on any of the chatter!!

Friday, June 5, 2015

Toi et Moi

Toi et Moi

A picture I took of my son and grandson while wandering the streets of D.C.


 I started this layout many a moons ago but it just didn't go with the picture I had in mind for it.  I loved the colors and textures on it so it went into my "save for later" pile.  What I love about this layout is the combining of so many different pieces from different companies and collections.  Just look how they all blend beautifully together. 


I used a damask stencil to create my background topped with colors spritzings and stamping.

Thank you for visiting!