Wednesday, November 25, 2015

Fall luminary "Helmar Design Team"


Hi everyone, Kathleen here with a fun simple and easy decor project for you.  I was cruising through pinterest the other day looking for fun fall designs when I came across this beautiful luminary.  This project can be made with real or silk leaves.  Even a novice like me found it so easy to make featuring Helmar Decoupage and craft Paste


Tips:  After using Helmar Decoupage and craft Paste make sure to wipe the rim of the jar and the lid thoroughly or by golly you will have a heck of a time opening it again.


I used an assortment of different sizes and colors of fall silk leaves.  I found it helps to take off the plastic veins on the back of the leaves before applying them to the jar.  A snip or two on the larger leaves helps in lapping them around the jar. 


With a wide brush in hand apply Helmar Decoupage and craft Paste liberally on the jar then begin adhering the leaves.  I repeated this basic step over and over until I was satisfied with the end results.  Yes, I did stop and let each layer dry before adding the next layer.  I just found it easier that way.

To complete the look I took a nice long length of jute twine and wrapped it around the top using more Helmar Decoupage and craft Paste.  That's it!


Place a small candle in the jar and your beautiful luminary is ready to shine on any table!


I hope this project has inspired you to take those jars out of the cupboard and create  beautiful fall luminaries of your own. 
As always the perfect design starts with the best Helmar glue products. - See more at: http://helmarusa.typepad.com/blog/page/2/#sthash.rcSYMIMo.dpuf

Wishing you and yours a warm and joy filled Thanksgiving.

Decoupage & Craft Paste 8.45 fl.oz.

Monday, November 23, 2015

On Santa's Knee {1,2,3 layout in minimal time}


On Santa's knee {Robin's Nest}

Are you ready to create beautiful Christmas layout in minimal time?
Kathleen here to share this fun and easy layout featuring Robin's Nest holiday cardstock!

On Santa's Knee


 Here is a simple, fun and quick layout for those holiday pictures!


1. A base paper
2. Cut out two tags from your favorite Christmas papers and punch a hole at the top. Engine stack!
3. Cut two strips of paper and notch.  Stack them on top of each other to form your train.
4. Emboss two clock chipboards with black embossing powder for the engine wheels.

What a sweet Train engine frame for your child's photo! 


I hope what you have seen here today has inspired you to let your own creativity take flight!
I would like to take this opportunity to wish you and yours a very happy love filled Christmas!


"Happy Christmas to all, and to all a goodnight"

Robin's Nest products

Robin's Nest

Friday, November 20, 2015

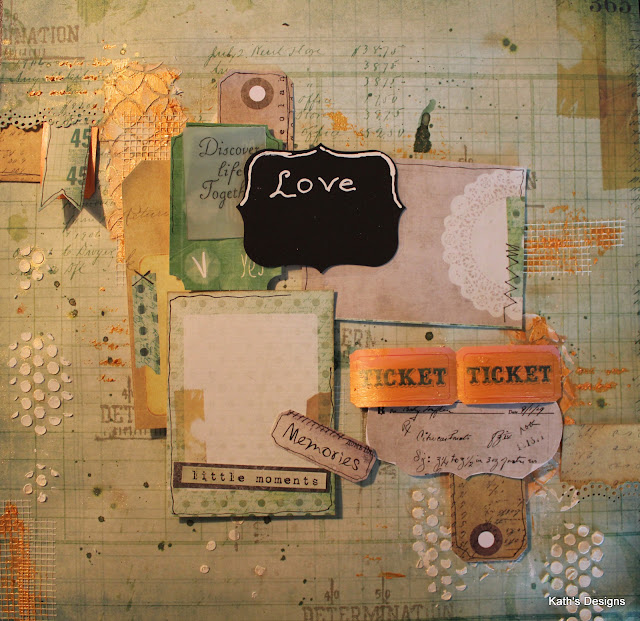
Little Moments a layout for Nani Ke Ola


Little Moments

Happy fall ya'll Kathleen here with a very special mixed media layout for you.My family flew in from around the country for my 60th birthday this year. It's not easy getting everyone together at the same time so I marched them down to our neighborhood trail and took family portraits.  It was hot and we were wilting!  But looking over them over I found this precious shot of my son and his family.


I love to use tags and those cut out cards on the back of the papers.  So let's gather them all up and create a fabulous collage style layout.


On the top left side of your layout {approx. 1/4 of the way down} cut a horizontal cut about 3" long.  Repeat the process on the lower right side of your layout {approx. 1/4 of the way up}.


Use your favorite border punch on the slit you created.  Add some masking and modeling paste to  and two different masks for added texture.  I also applied strips of drywall tape.

Now add mists and a touch of stamping.
Now for the collage work.  Using your border punch slit at the top as your guide cascade your tags and die cuts down from the left side to the right side tucking and layering as you go.
Finish up with some flowers and a touch of ribbon.
Products

I hope this has inspired you to let your own imagination take flight.  Be sure to stop by the store for all of your scrapping supplies.  New things are being added for the holidays!


Creating with Paper and more Word Challenge
I used the word "together" and the colors orange.


Monday, November 16, 2015

C'est Magnifique sneak peek

December Kit Sneak Peek

Here we are at the middle of the month again and that means we're excited to give you a look at the paper we will be using in our December Kit, the Magnifique Mixed Media Kit, the Card Kit, and our two add-ons.
The patterned paper for December:
C'est Magnifique's own specially made Holiday Collection designed by Astrid Maclean.

Christmas Holly & Christmas Time
Let It Snow & Jolly Holly
Father Christmas & Christmas Angel
Riding Through The Snow & Joyful Christmas 
The December Magnifique Mixed Media Kit is available now in our Store!
Blue Fern Studio: Classic Corners*
Blue Fern Studios: Imagine Ink: Leaf 
Bulb Handled Rought Stippling Brrush
C'est Magnifique: Glaze: Ice Crystals
Cardbord*
C'est Magnifique: Mist: Cranberry
C'est Magnifique: O Rings
C'est Magnifique: Paint: Patina
Darice: Bling on a Roll: Gold*
Faber-Castell Design Memory Craft: Glass Bead Glitter Gel*
Offray: Green Ribbon*
Petaloo: Christmas Flora Doodles: Velvet Holiday Mini Poinsettias: Red
Petaloo: Darjeeling: Glass Ornament Pins: Red
Prima: A Victorian Christmas: Midnight Kiss 
Records
Sandpaper*
Stampendous Ultra Fine Glitter: Pearl Green*
 Technique Tuesday Clear Stamp: Scritch Scratch
Wax
Websters Pages: Strawberry Fields: Little Letter Stickers: White
*Partial Package
Djamila Khiter prepared a preview video of the Mixed Media Kit for you!
The December Magnifique Card Kit is available now in our Store!
Assorted Buttons*
Bazzill: 12x12 Dotted Swiss Cardstock: Blissful (3)
Darice: Bling on a Roll: Red*
DoCrafts: Papermania: Nature's Gallery: Mini Alphabet Stickers
Envelopes: Assorted Colors and Sizes
Green Jute Twine
Prima: A Victoria Christmas: Christmas Eve
Prima: Gold Doilies
 Ribbon
Teresa Collins: Santa's List
*Partial Package
Flower Add-On

We create a Flower Add-On each month for those of you who like extra flowers. We have selected flowers that compliment the kit and put them together as an add-on.
Burgundy Flower Bouquet (Not Shown)
Prima: A Victorian Christmas: Holiday Lights
Prima: A Victorian Christmas: Joyeux Noel
Prima: A Victorian Christmas: Red Stocking
Prima: A Victorian Christmas: Rudolph's Nose
Prima: A Victorian Christmas: Twelfth Night
Lastly, we have an Embellishment Add-On so you can stretch your kit even further.

Authentique: Adventure Cardstock Stickers: Petite Type Alphas: Green
Bo Bunny: Christmas Collage: Self-Adhesive Layered Chipboard
C'est Magnifique: Cream Lace*
Darice: Bling on a Roll: Gold
Offray: Ribbon
Prima: 4-inch Paper Doilies: Round Gold 
Prima: A Victorian Christmas: Sleighbells
Prima: Clear Stamp: Doily
Prima: Metal Embellishments #8*
Prima: Shabby Chic Treasures: Door Signs
May Arts: Cut-Out Satin Ribbon: Green Holly Leaves
Maya Road: Crafting Jute Cording: Pine Green*
Maya Road: Vintage Metal Charms: Bronze Holiday Wreaths

*Partial Package
Doesn't the December Kit look gorgeous?
The Magnifique Mixed Media Kit, the Card Kit, the Flower Add-On and the Embellishment Add-On are available now for purchase in the C'est Magnifique Store!  

Saturday, November 14, 2015

Christmas Joy


Christmas Preview Day 7


Blue Fern Studios has created  a beautiful nostalgic Christmas collection this year which I am gaga over!  I adore the soft teal and pinks off set by the bold striking red.


I don't know about you but this is a very hectic time of year for me.  This is why I love to create layers on my layouts.  Vintage Christmas has a postcard paper that I cut apart and start and layer across the main paper.  I love the affect.

I simply finish by misting a few pieces of chipboard with coordinating paints add a few flowers and viola a master piece! 


I hope what you have seen here today has inspired you to let your own creativity take flight!
Don't forget to stop in and see what's new in the store or just to stock up on those holiday supplies.


Papers

Embellishments
7 Dots Studio - Soul Mates chipboard 


Blue Fern Studios: Sketch challenge


 Scrap Around the World moodboard
I was inspired by the overall colors, the candy cane stripes and the tree and lastly the cozy feeling of the holidays!

Friday, November 13, 2015

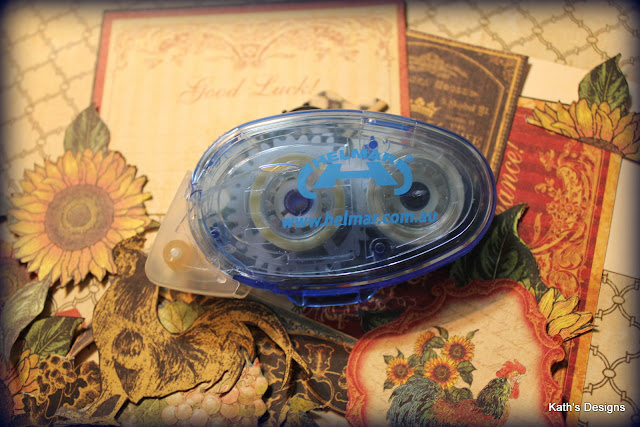
Good Luck layout featuring Helmar Quickfix Adhesive Runner


Hooray for Fall!!!

Love this picture of my daughter and her classmates celebrating the completion of their master's program for P.A.  Kathleen here and one super proud mom at that!  So today I thought I would share a simple layout using layering and featuring Helmar Quickfix Adhesive Runner.


I selected an assortment of cards, tags, chipboard and fussy cut flowers, rooster and fruit from Graphic 45 French Country Collection.  Beginning with a neutral background paper I edged it by painting on walnut stain. Run your Helmar Adhesive runner a couple of times on the back side of each of these cards.


 Begin by cascading your large rectangular card from the top middle of the paper down to the center right hand side.  Use your Helmar Scrap Dots on the back of the picture and float it over the frame.

Tuck your chipboard under the frame and again on the bottom piece using Helmar Professional Acid free Glue.  Starting half way down from the left side of the paper cascade your fruits and flowers to the bottom center of the paper. Use Helmar Adhesive runner on the base flowers but set a few aside.


To give dimension to some of my sunflowers and grapes I popped a couple of the 1/2" Zapdots underneath.


I hope this Autumn project has inspired your to create your own seasonal creation!  As always the perfect design starts with the best Helmar glue products.


Creative Embellishments
I was inspired by the sun flower.
Shroom-Whimsical-Autumn-Fantasy-Art_art

Berry 71 bleu moodboard
I used the old world charm, the color palette, and filigree 
November 2015 Challenge

Scrap Africa


Helmar Products

Zapdots Black 1/2" round
Helmar Professional Acid free Glue
Zapdots Black Round 1/2     Acid Free Glue 1.7 fl.oz.  


Creative Embellishments flourish frame chipboard
Graphic 45 French Country collection papers


Quickfix Adhesive Runner

Tuesday, November 10, 2015

Be Merry {Nani Ke Ola DT}


Christmas preview week at


I am so excited to share this Christmas themed layout with you featuring 7 Dots Studio's Yuletide collection. 
I have visions of Dr. Seuss's  "How the Grinch Stole Christmas" when I look at the reds and lime greens.  Such a beautiful collection and Nani Ke Ola is your one stop shop for them.


My layout began with the Gingerbread paper.  I did a bit of snow flake stamp embossing in gold over the entire page then flicked white paint.  
 Next I cut a 6"x 12" piece from Figgy Pudding and cut that into a 6"x 8" and a 6"x4" piece. Then I gathered up a selection of tags and began layering. 
Now for a few finishing touches with beads, flowers and chipboard.


I hope what you have seen here today has inspired you to let your own creativity take flight!
Papers

Embellishments

Mixed Media
Lindy's Stamp Gang-Ponderosa Pine Olive   

7 Dots Studio
Woodgrain


Scrap Around the World
I was inspired by the plaque saying, the color red and the houses(I created the feel of them by stacking the tags).  Awesome moodboard!